If you are an Apple’s product user, that means you are lacking to know how to back up your Apple iPhone or iPad. Backing up your iPhone or iPad is an essential task that everyone should perform regularly. It ensures that all your important data, such as photos, contacts, and messages, are safe in case of loss or damage to your device. In this article, we will guide you on how to back up your Apple iPhone or iPad and keep your data safe.
The methods used to make you know how to back up your Apple iPhone or iPad
There are two methods to back up your Apple iPhone or iPad using iCloud or using iTunes. we are going to describe them both in the next few lines:
Backing up using iCloud
iCloud is a cloud-based storage service provided by Apple. It offers 5 GB of free storage to each Apple user, which can be used to back up your iPhone or iPad. Follow these steps to back up using iCloud:
Step 1: Connect to Wi-Fi
Make sure that your device is connected to Wi-Fi. iCloud backups can be very large, and therefore, it is recommended that you use Wi-Fi to avoid additional data charges.
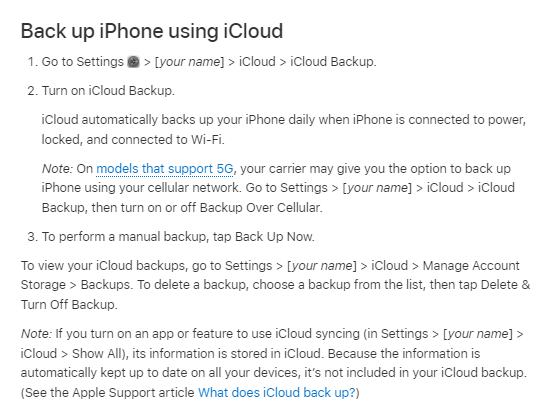
Step 2: Open Settings
Go to the Settings app on your iPhone or iPad.
Step 3: Tap your name
Tap your name at the top of the screen, and then tap iCloud.
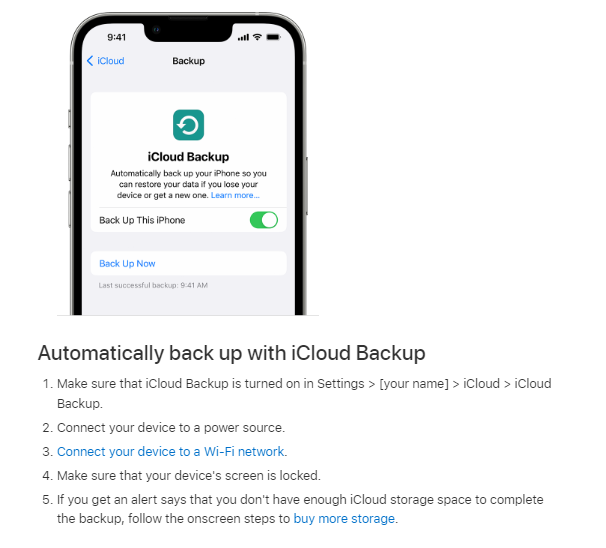
Step 4: Tap iCloud Backup
Scroll down to find iCloud Backup, and then tap it.
Step 5: Turn on iCloud Backup
Toggle the iCloud Backup switch to turn it on. If prompted, tap OK to confirm.
Step 6: Start backup
Tap Back Up Now to start the backup process. Depending on the size of your backup and the speed of your Wi-Fi connection, this process may take some time.
Step 7: Check the backup status
Once the backup is complete, you can check the backup status by going to Settings > [your name] > iCloud > iCloud Backup. Here, you can see the date and time of the last backup and the size of the backup.
Backing up using iTunes
Also, you can back up your Apple iPhone or iPad via iTunes. iTunes is a media player, media library, and mobile device management application provided by Apple. It can also be used to back up your iPhone or iPad.
Follow these steps to back up using iTunes:
Step 1: Connect to your computer
Connect your iPhone or iPad to your computer using a USB cable.
Step 2: Open iTunes
Open iTunes on your computer. If you don’t have iTunes installed, you can download it from the Apple website.
Step 3: Select your device
Click on the device icon that appears in the top left corner of the iTunes window.
Step 4: Select the backup method
Under the Backups section, select This computer and then choose either Back Up Now or Encrypt Backup to add a password to your backup.
Step 5: Start backup
Click on the Back Up Now button to start the backup process.
Step 6: Check the backup status
Once the backup is complete, you can check the backup status by going to iTunes > Preferences > Devices. Here, you can see the date and time of the last backup and the size of the backup.
Read also: How do I delete Apps on iPhone and iPad ?
Read also: The proven method to Create new Apple ID
Tips for back up your Apple iPhone or iPad
Back up regularly
It is recommended that you back up your iPhone or iPad regularly, ideally once a week. This ensures that your most recent data is always backed up.
Use both iCloud and iTunes
It is a good idea to use both iCloud and iTunes to back up your iPhone or iPad. iCloud backups are convenient and automatic, but they are limited by the amount of storage available on your iCloud account. iTunes backups are more flexible and can be stored on your computer’s hard drive, but they require manual intervention.
Keep your backup secure
Make sure to keep your backup secure by using a strong password and keeping it in a safe place. This is especially important if you choose to encrypt your backup using iTunes.